2. Problem Solving and Programming
If you can’t solve a problem, then there is an easier problem you can solve: find it.
2.1. Problem: How to solve problems
How do we solve problems in general? This question is the motivating problem (or meta-problem, even) for this chapter. In fact, this question is the motivating problem for this book. We want to understand the process of solving problems with computers.
As we mentioned in the previous chapter, many computer programs such as business applications and web browsers have already been created to help people solve problems, but we want to solve new problems by writing our own programs. The art of writing these programs is called computer programming or just programming.
Many people reading this book will be computer science students, and that’s great. However, computers have found their way into every segment of commercial enterprise and personal life. Consequently, programming has become a general-purpose skill that can aid almost anyone in their career, whether it’s in transportation, medicine, the military, commerce, or innumerable other areas.
2.1.1. What is a program?
If you don’t have a lot of experience with computer science, writing a computer program may seem daunting. The programs that run on your computer are complex and varied. Where would you start if you wanted to create something like Microsoft Word or Adobe Photoshop?
A computer program is a sequence of instructions that a computer follows. Even the most complex program is just a list of instructions. The list can get very long, and the computer can jump around the list when it makes decisions about what to do next.
Researchers continue to make progress in the field of artificial intelligence, but there is still an enormous gulf between artificial intelligence and human intelligence. Furthermore, it is the software whose intelligence those researchers strive to improve. Computer hardware is neither smart nor stupid because a computer has no intelligence to measure. A computer is a machine like a sewing machine or an internal combustion engine. It follows the instructions we give it blindly. It doesn’t have feelings or opinions about the instructions it receives. Computers do exactly what we tell them to and rarely make mistakes.
Once in a while, a computer will make a mistake due to faulty construction, a bad power source, or cosmic rays, but well over 99.999% of the things that go wrong with computers are because some human somewhere gave a bad instruction. This point highlights one of the most challenging aspects of programming a computer. How do you organize your thoughts so that you express to the computer exactly what you want it to do? If you give a person directions to a drug store, you might say, “Walk east for two blocks and then go into the third door on the right.” The human will fill in all the necessary details: Stopping for traffic, crossing at crosswalks, watching out for construction, and so on. Given a robot body, a computer would do exactly what you say. The instructions never mentioned opening the door, and so a computer might walk right through the closed door, shattering glass in the process.
2.1.2. What is a programming language?
What’s the right level of detail for instructions for a computer? It depends on the computer and the application. But how do we give these instructions? Programs are composed of instructions written in a programming language. In this book, we will use the Java programming language.
Why can’t the instructions be given in English or some other natural language? If the previous example of a robot walking through a glass door didn’t convince you, consider the quote from Groucho Marx, “One morning I shot an elephant in my pajamas. How he got into my pajamas, I’ll never know.”
Natural languages are filled with idioms, metaphors, puns, and other ambiguities. Good writers use these to give life to their poetry and prose, but our goal in this book is not to write poetry or prose. We want to write crystal clear instructions for computers.
Learning Java is not like learning Spanish or Swahili. Like most programming languages, Java is highly structured. It has fewer than 100 reserved words and special symbols. There are no exceptions to its grammatical rules. Don’t confuse the process of designing a solution to a problem with the process of implementing that solution in a programming language. Learning to organize your thoughts into a sequential list of instructions is different from learning how to translate that list into Java or another programming language, but there’s a tight connection between the two.
Learning to program is patterning your mind to think like a machine, to break everything down into simple logical steps. At first, Java code will look like gobbledygook. Eventually, it’ll become so familiar that a glance will tell you volumes about how a program works. Learning to program is not easy, but the kind of logical analysis involved is valuable even if you never program afterward. If you do need to learn other programming languages in the future, it will be easy once you’ve mastered Java.
2.1.3. An example problem
This chapter takes a broad approach to solving problems with a computer, but we need an example to make some of the steps concrete. We use the following problem from physics as an example throughout this chapter.
A rubber ball is dropped on a flat, hard surface from height h. What’s the maximum height the ball will reach after the kth bounce? We’ll discuss the steps needed to create a program to solve this problem in the next section.
2.2. Concepts: Developing software
2.2.1. Software development lifecycle
The engineers who built the first digital computers also wrote the programs for them. In those days, programming was closely tied to the hardware, and the programs were not very long. As the capabilities of computers have increased and programming languages have evolved, computer programs have grown more and more complicated. Hundreds of developers, testers, and managers are needed to write a set of programs as complex as Microsoft Windows 10.
Organizing the creation of such complicated programs is challenging, but the industry uses a process called the software development lifecycle to help. This process makes large projects possible, but we can apply it to the simpler programs we’ll write in this book as well. There are many variations on the process, but we’ll use a straightforward version with the following five steps:
-
Understand the problem: It seems obvious, but when you go to write a program, all kinds of details need to be worked out. Consider a program that stores medical records. Should the program give an error if a patient’s age is over 150 years? What if advances in long life or cryogenic storage make such a thing possible? What about negative ages? An unborn child (or more outlandishly, someone who had traveled back into the past using a time machine) could be considered to have a negative age.
Even small details like these must be carefully considered to understand a problem fully. In industry, understanding the problem is often tied to a requirements document, in which a client lays out the features and functionality that the final program should have. The “client” could also be a manager or executive officer of the company you work for who wants your development team to create a certain kind of program. Sometimes the client does not have a strong technical background and creates requirements that are difficult to fulfill or vaguely specified. The creation of the requirements document can be a negotiation process in which the software development team and their client decide together what features are desirable and reasonable.
If you’re taking a programming class, you can think of your instructor as your client. Then, you can view a programming assignment as a requirements document and your grade as your payment awarded based on how well the requirements were fulfilled.
-
Design a solution: Once you have a good grasp on the problem, you can begin to design a solution. For large scale projects, this may include decisions about the kinds of hardware and software packages that will be needed to solve the problem. For this book, we’ll only talk about problems that can be solved on standard desktop or laptop computers with Java installed.
We’ll be interested only in the steps that the computer will have to take to solve the problem. A finite list of steps taken to solve a problem is called an algorithm. If you’ve ever done long division (or any other kind of arithmetic) by hand, you’ve executed an algorithm. The steps for long division will work for any real numbers, and most human beings can follow the algorithm without difficulty.
An algorithm is often expressed in pseudocode, a high level, generic, code-like system of notation. Pseudocode is similar to a programming language, but it doesn’t have the same detail. Algorithms are often designed in pseudocode so that they aren’t tied to any one programming language.
When attacking a problem, it’s typical to break it into several smaller subproblems and then create algorithms for the subproblems. This approach is called top-down programming.
-
Implement the solution: Once you have your solution planned, you can implement it in a programming language. This step entails taking all the pseudocode, diagrams, and any other plans for your solution and translating them into code in a programming language. We use Java for our language in this book, but real developers use whichever language they feel is appropriate.
If you’ve designed your solution with several parts, you can implement each one separately and then integrate the solutions together. Professional developers often assign different parts of the solution to different programmers or even different teams of programmers.
Students are often tempted to jump into the implementation step, but never forget that this is the third step of the process. If you don’t fully understand the problem and have a plan to attack it, the implementation process can become bogged down and riddled with mistakes. At first, the problems we introduce and the programs needed to solve them will be simple. As you move into more complicated problems in this book and in your career as a programmer, a good understanding of the problem and a good plan for a solution will become more and more important.
-
Test the solution: Expressing your algorithm in a programming language is difficult. If your algorithm was wrong, your program won’t always give the right answer. If your algorithm was right but you made a mistake implementing it in code, your program will still be wrong. Programming is a very detail-oriented activity. Even experienced developers make mistakes all the time.
Good design practices help, but all code must be thoroughly tested after it’s been implemented. It should be tested exhaustively with expected and unexpected input. Tiny mistakes in software called bugs can lie hidden for months or even years before they’re discovered. Sometimes a software bug is a source of annoyance to the user, but other times, as in aviation, automotive, or medical software, people die because of bugs.
Most of this book is dedicated to designing solutions to problems and implementing them in Java, but Chapter 16 is all about testing and debugging.
-
Maintenance: Imagine you’ve gone through the previous four steps: You understood all the details of a problem, planned a solution to it, implemented that solution in a programming language, and tested it until it was perfect. What happens next?
Presumably your program is shipped to your customers and they happily use it. But what if a bug is discovered that slipped past your testing? What if new hardware comes out that’s not compatible with your program? What if your customers demand that you change one little feature?
Particularly with complex programs that have a large number of consumers, a software development company must spend time on customer support. Responsible software developers are expected to fix bugs, close security vulnerabilities, and polish rough features. This process is called maintenance. Developers are often working on the next version of the product, which could be considered maintenance or a new project entirely.
Although we cannot stress the importance of the first four steps of the software development lifecycle enough, maintenance is not something we talk about in depth.
The software development lifecycle we presented above is a good guide, but it does not go into details. Different projects require different amounts of time and energy for each step. It’s also useful to focus on the steps because it’s less expensive to fix a problem at an earlier stage in development. It’s impossible to set the exact numbers, but some developers assume that it takes ten times as much effort to fix a problem at the current step than it would have at the previous step.
Imagine that your company works on computer-aided design (CAD) software. The requirements document for a new program lists the formula for the area of a triangle as base · height when the real formula is ½ base · height. If that mistake were caught while understanding the problem, it would mean changing one line of text. Once the solution to the problem has been designed, there might be more references to the incorrect formula. Once the solution has been implemented, those references will have turned into code that is scattered throughout the program. If the project were poorly designed, several different pieces of code might independently calculate the area of a triangle incorrectly. Once the implementation has been tested, a change to the code will mean that everything has to be tested from the very beginning, since fixing one bug can cause other bugs to surface. Finally, once the maintenance stage has been reached, the requirements, plan, implementation, and testing would all need to be updated to fix the bug. Moreover, customers would already have the faulty program. Your company would have to create a patch to fix the bug and distribute it over the Internet.
Most bugs are more complicated and harder to fix, but even this simple one causes greater and greater repercussions as it goes uncaught. A factor of ten for each level implies that it takes 10,000 times more effort to fix it in the maintenance phase than at the first phase. Since fixing it at the first phase would have required a few keystrokes and fixing it in the last phase would require additional development and testing with web servers distributing patches and e-mails apologizing for the mistake, a factor of 10,000 could be a reasonable estimate.
Now that we have a sense of the software development lifecycle, let’s look at an example using the sample ball bouncing problem to walk some of its steps.
Recall the statement of the problem from the Problem section:
A rubber ball is dropped on a flat, hard surface from height h. What is the maximum height the ball will reach after the kth bounce?
-
Understand the problem: This problem requires an understanding of some physics principles. When a ball is dropped, the height of its first bounce depends on a factor known as the coefficient of restitution.
If c is the coefficient of restitution, then the ball will bounce back the first time to a height of hc. Then, we can act as if the ball were being dropped from this new height when calculating the next bounce. Thus, it will bounce to a height of hc2 the second time. By examining this pattern for the third and fourth bounce, it becomes clear that the ball will bounce to a height of hck on the kth time. See Figure 2.1 for a graphic description of this process.
We’re assuming that k > 0 and that c < 1. Note that c depends on many factors, such as the elasticity of the ball and the properties of the floor on which the ball is dropped. However, if we know that we will be given c, we don’t need to worry about any other details.
 Figure 2.1 A ball is dropped from height h. The ball rises to height hc after the first bounce and to hc2 after the second.
 -
Design a solution: This problem is straightforward, but it’s always useful to practice good design. Remember that you’ve got to plan your input and output as well as the computation in a program. As practice for more complicated problems, let’s break this problem down into smaller subproblems.
- Subproblem 1
-
Get the values of h, c, and k from the user.
- Subproblem 2
-
Compute the height of the ball after the kth bounce.
- Subproblem 3
-
Display the calculated height.
The solution to each of the three subproblems requires input and generates an output. Figure 2.2 shows how these solutions are connected. The first box in this figure represents the solution to subproblem 1. It asks a user to input values of parameters h, c, and k. It sends these values to the next box, which represents a solution to subproblem 2. This second box computes the height of the ball after k bounces and makes it available to the third box, which represents a solution to subproblem 3. This third box displays the calculated height.
 Figure 2.2 Connections between solutions to the three subproblems in the bouncing ball problem.
Before we can continue on to Step 3, we need to learn some Java. Section 2.3 introduces you to the Java you’ll need to solve this problem.
2.2.2. Acquiring a Java compiler
Before we introduce any Java syntax, you should make sure you have a Java compiler set up so that you can follow along and test your solution. Programming is a hands-on skill. It’s impossible to improve your programming abilities without practice. No amount of reading about programming is a substitute for the real thing.
Where can you get a Java compiler? Fortunately, there are free options for almost every platform. Non-Windows computers may already have the Java Runtime Environment (JRE) installed, allowing you to run Java programs; however, many Java development options require you to have the Java Development Kit (JDK). Oracle may change the website, but at the time of writing you can download the JDK from the Oracle downloads site. Download a current version (e.g., Java SE 8 or 11) of the Java Platform, Standard Edition JDK and install it.
After having done so, you should be able to compile programs using the
javac command, whose name is short for “Java compiler.” To do so,
open a terminal window, also known as a command line interface or the
console. To open the terminal in Windows, choose the Windows Powershell
option from the Start Menu. To open the
terminal in macOS, select Terminal from the Utilities folder. Different distributions of
Linux have different ways of accessing the terminal, but Linux users are usually
familiar with their terminal.
Provided that you have your path set correctly, you should be able to
open the terminal, navigate to a directory containing files that end in
.java, and compile them using the javac command. For example, to
compile a program called Example.java to bytecode, you would type:
javac Example.java
Compiling the program creates a .class file, in this case,
Example.class. To run the program contained in Example.class, you
would type:
java Example
Doing so fires up the JVM, which uses the JIT compiler to compile the
bytecode inside Example.class into machine code and run it. Note that
you type only Example not Example.class when specifying the
program to run. Using just these commands from the terminal, you can
compile and run Java programs. The command line interface used to be the
only way to interact with a computer, and though it seems primitive at
first, the command line has amazing power and versatility.
To use the command line interface to compile your own Java program, you must first create a text file with your Java code in it. The world of programming is filled with many text editor applications whose only purpose is to make writing code easier. These editors are not like Microsoft Word: They are not used to format the text into paragraphs or apply bold or italics. Their output is a “plain” text file, containing only unformatted characters, similar to the files created by Notepad. Some text editors have advanced features useful for programmers, such as syntax highlighting (marking special words and symbols in the language with colors or fonts), language-appropriate auto-completion, and powerful find and replace tools. Two of the most popular text editors for command line use are vi-based editors, particularly Vim, and Emacs-based editors, particularly GNU Emacs.
Many computer users, however, are used to a graphical user interface (GUI), where a mouse can be used to interact with windows, buttons, text boxes, and other elements of a modern user interface. There are Java programming environments that provide a GUI from which a user can write Java code, compile it, execute it, and even test and debug it. Because these tools are integrated into a single program, these applications are called integrated development environments (IDEs).
Two of the most popular Java IDEs are Eclipse and IntelliJ IDEA. Eclipse is open-source, free, and available here. Although some versions of IntelliJ IDEA cost money, the Community edition of IntelliJ IDEA is free and available here.
Which text editor or graphical IDE you use is up to you. Programming is a craft, and every artisan has favorite tools. Most of the content of this book is completely independent from the tools you use to write and compile your code. One exception is Chapter 16, in which we briefly discuss the debugging tools in Eclipse and IntelliJ IDEA.
If you choose Eclipse, IntelliJ IDEA, or another complex IDE, you may wish to read online tutorials to get started. These IDEs often require the user to make a project and then create Java files inside. The idea of a project containing related source code files is a useful one and is very common in software engineering, but it is not a part of Java itself.
2.3. Syntax: Java basics
In this section, we start with the simplest Java programs and work up to the solution to the bouncing ball problem. Syntax is the rules for constructing legal programs, just as English grammar is the rules for constructing legal English sentences. Java was first released in 1995, a long time ago in the history of computer science, but it was based on even older languages. Its syntax inherits ideas from C, C++, and other languages.
Some critics have complained about elements of the syntax or semantics of Java. Semantics are rules for what code means. Remember that Java is an arbitrary system, designed by fallible human beings. The rules for building Java programs are generally logical, but they are artificial. Learning a new programming language is a process of accepting a set of rules and coming up with ways to use those rules to achieve your own ends.
There are reasons behind the rules, but we won’t always be able to explain those reasons in this book. As you begin to learn Java, you’ll have to take it on faith that such-and-such a rule is necessary, even though it seems useless or mysterious. In time, these rules will become familiar and perhaps sensible. The mystery will fade away, and the rules will begin to look like an organic and logical (though imperfect) system.
2.3.1. Java program structure
The first rule of Java is that all code goes inside of a class. A class is a container for blocks of code called methods, and it can also be used as a template to create objects. We’ll talk a bit more about classes in this chapter and then focus on them heavily in Chapter 9.
For now, you only need to remember that every Java program has at least
one class. It is possible to put more than one class in a file, but you
can only have one top-level public class per file. A public class is
one that can be used by other classes. Almost every class in this book
is public, and they should be clearly marked as such. To create a public
class called Example, you would type the following:
public class Example {
}
A few words in Java have a special meaning and cannot be used for
other purposes (like the name you give a class). These are called keywords or
reserved words. The keyword public marks the class as public. The
keyword class states that you are declaring a class. All keywords are lowercase in Java.
The name Example gives the name of the class. By convention, all class names
start with a capital letter. The braces ({ and }) mark the start
and end of the contents of the class. Right now, our class contains
nothing.
This text should be saved in a file called Example.java. It’s
required that the name of the public class matches the file that it’s
in, including capitalization. Once Example.java has been saved, you
can compile it into bytecode. However, since there’s nothing in class
Example, you can’t run it as a program.
A program is a list of instructions, and that list has to start
somewhere. For a normal Java application, that place is the main()
method. Throughout this book, we always append parentheses () to mark
the name of a method. If we want to do something inside of Example,
we’ll have to add a main() method like so:
public class Example {
    public static void main(String[] args) {
    }
}
There are several new items now. As before, public means that other
classes can use the main() method. The static keyword means that the
method is associated with the class as a whole and not a particular
object. The void keyword means that the method does not give back a result.
The word main is obviously the name of the method, but it has
to be spelled exactly that way (including capitalization) to work.
Perhaps the most confusing part is the expression String[] args, which
is a list of text (strings) given as input to the main() method from
the command line. As with the class, the braces mark the start and end
of the contents of the main() method, which is currently empty.
Right now, you don’t need to understand any of this. All you need to
know is that, to start a program, you need a main() method and its
syntax is always the same as the code listed above. If you save this
code, you can compile Example.java and then run it, and…nothing
happens! It’s a perfectly legal Java program, but the list of
instructions is empty.
2.3.2. Command line input and output
An important thing for a Java program to do is to communicate with the outside world (where humans live). First, let’s look at printing data to the command line and reading data in from the command line.
The System.out.print() method
Methods allow us to perform actions in Java. They are blocks of code packaged up with a name so that we can run the same piece of code repeatedly but with different inputs. We discuss them in much greater depth in Chapter 8.
A common method for output is System.out.print(). The input (usually
called arguments) to a method are given between its parentheses. Thus,
if we want to print 42 to the terminal, we type:
System.out.print(42);Note that the use of the method has a semicolon (;) after it. An
executable line of code in Java generally ends with a semicolon to
separate it from the next instruction. We can add this code to our
Example class, yielding:
public class Example {
    public static void main(String[] args) {
        System.out.print(42);
    }
}
If we want to print out text, we give it as the argument to
System.out.print(), surrounded by double quotes ("). It’s necessary
to surround text with quotes so that Java knows it’s text and not the
name of a class, method, or variable. Text surrounded by double quotes
is called a string. The following program prints Forty two onto the
terminal.
public class Example {
    public static void main(String[] args) {
        System.out.print("Forty two");
    }
}
Printing out one thing is great, but programs are usually composed of many instructions. Consider the following program:
public class Example {
    public static void main(String[] args) {
        System.out.print(2);
        System.out.print(4);
        System.out.print(6);
        System.out.print(8);
    }
}
As you can see, each executable line ends with a semicolon, and they are
executed in sequence. This code prints 2, 4, 6, and 8 onto the screen.
However, we did not tell the program to move the cursor to a new line at
any point so the output on the screen is 2468, which looks like a
single number. If we want them to be on separate lines, we can achieve
this with the System.out.println() method, which moves to a new line
after it finishes output.
public class Example {
    public static void main(String[] args) {
        System.out.println(2);
        System.out.println(4);
        System.out.println(6);
        System.out.println(8);
    }
}
This change makes the output into the following:
2
4
6
8
In Java, it’s possible to insert math almost anywhere. Consider
the following program, which uses the + operator.
public class Example {
    public static void main(String[] args) {
        System.out.print(35 + 7);
    }
}
This code prints out 42 to the terminal just like our earlier example,
because it does the addition before giving the result to
System.out.print() for output.
The Scanner class
We want to be able to read input from the user as well. For command line
input, we need to create a Scanner object. This object is used to read
data from the keyboard. The following program asks the user for an
integer, reads in an integer from the keyboard, and then prints out the
value multiplied by 2.
import java.util.Scanner;

public class Example {
    public static void main(String[] args) {
        Scanner in;
        in = new Scanner(System.in);
        System.out.print("Enter an integer: ");
        int value;
        value = in.nextInt();
        System.out.print("That number doubled is: ");
        System.out.println(value * 2);
    }
}
This program introduces several new elements. First, note that it begins
with
import java.util.Scanner;. This line of code tells the compiler to use
the Scanner class that is in the java.util package. A package is a
way of organizing a group of related classes. Someone else wrote the
Scanner class and all the other classes in the java.util package,
but by importing the package, we’re able to use their code in our
program.
Then, skip down to the first line in the main() method. The code
Scanner in; declares a variable called in with type Scanner.
A variable can hold a value. The variable has a specific type, meaning
the kind of data that the value can be. In this case the type is
Scanner, meaning that the variable in holds a Scanner object.
Declaring a variable creates a box that can hold things of the specified
type. To declare a variable, first put the type you want it to have,
then put its identifier or name, and then put a semicolon. We chose to
call the variable in, but we could have called it input or even
marmalade if we wanted. It’s always good practice to name your
variable so that it’s clear what it contains.
The next line assigns a value to in. The assignment operator (=)
looks like an equal sign from math, but think of it as an arrow that
points left. Whatever’s on the right side of the assignment operator
will be stored into the variable on the left. The variable in was
an initially empty box that could hold a Scanner object. The code
new Scanner(System.in) creates a brand new Scanner object based on
System.in, which means that the input will be from the keyboard. The
assignment stored this object into the variable in. The fact that
System.in was used has nothing to do with the fact that our variable
was named in. Again, don’t expect to understand all the details at
first. Any time you need to read data from the keyboard, you’ll need
these two lines of code, which you should be able to copy verbatim. It’s
possible to both declare a variable and assign its value in one line.
Instead of the two line version, most programmers would type:
Scanner in = new Scanner(System.in);Similarly, the line int value; declares a variable for holding integer
types. The next line uses the object in to read an integer from the
user by calling the nextInt() method. If we wanted to read a floating-point
value, we would have called the nextDouble() method. If we
wanted to read some text, we would have called the next() method.
Unfortunately, these differences means that we have to know what type of
data the user is going to enter. If the user enters an unexpected type,
our program could have an error. As before, we could combine the
declaration and the assignment into a single line:
int value = in.nextInt();The final two lines give output for our program. The former prints
That number doubled is: to the terminal. The latter prints out a
value that is twice whatever the user entered. The next two examples
illustrate how Scanner can be used to read input while solving
problems. The first example shows how these elements can be applied to
subproblem 1 of the bouncing ball problem, and the second example
introduces and solves a new problem.
Subproblem 1 requires us to get the height, coefficient of restitution, and number of bounces from the user. Program 2.1 shows a Java program to solve this subproblem.
import java.util.*; (1)

public class GetInputCLI { (2)
    public static void main(String[] args) { (3)
        // Create an object named in for input
        Scanner in = new Scanner(System.in); (4)

        // Declare variables to hold input data
        double height, coefficient; (5)
        int bounces;

        // Prompt the user and read data from the keyboard
        System.out.println("Bouncing Ball: Subproblem 1"); (6)
        System.out.print("Enter the height: ");
        height = in.nextDouble(); (7)
        System.out.print("Enter restitution coefficient: "); (8)
        coefficient = in.nextDouble();
        System.out.print("Enter the number of bounces: ");
        bounces = in.nextInt();
    }
}| 1 | Unlike our earlier example, the first line of GetInputCLI.java is
import java.util.*;. Instead of importing only the Scanner class,
this line imports all the classes in the java.util package. The
asterisk (*) is known as a wildcard. The wildcard notation is
convenient if you need to import several classes from a package or if
you don’t know in advance the names of all the classes you’ll need. |
| 2 | The class declaration names the class GetInputCLI. We put a CLI at the end of the name to mark that
it uses the command line interface, contrasting with the GUI version that we’re going to show next. |
| 3 | Inside the class declaration is the
definition of the main() method, showing where the program starts. The text that comes after double slashes (//) is called a comment. Comments allow us to make our code more readable to humans, but the
compiler ignores them. |
| 4 | After the comments, we declare and instantiate a Scanner variable called in for reading from the keyboard. |
| 5 | Next, we declare two double
variables (for holding double precision floating-point numbers) and an
int variable (for holding an integer value). |
| 6 | We print out the name of the problem and then print out "Enter the height: ". |
| 7 | The line height = in.nextDouble(); tries to read in the height from the user. It waits until the user hits enter before reading the value and moving on to the next line. |
| 8 | The last four lines of the program prompt and read in the coefficient of restitution and then the number of bounces. If you compile and run this program, the execution should match the steps described. Note that it only reads in the values needed to solve the problem. We haven’t added the code to compute the answer or display it. |
Let’s write a program that takes as input the speed of a moving object and the time it’s been moving. The goal is to compute and display the total distance it travels. We can divide this problem into the following three subproblems.
- Subproblem 1
-
Input speed and duration.
- Subproblem 2
-
Compute distance traveled.
- Subproblem 3
-
Display the computed distance.
Program 2.2 solves each of these subproblems in order, using the command-line input and output tools we have just discussed.
import java.util.*; (1)

public class Distance {
    public static void main(String[] args) {
        // Create an object named in for input
        Scanner in = new Scanner(System.in);  (2)
        double speed, time;
        double distance; // Distance to be computed

        // Solution to subproblem 1: Read input
        // Prompt the user and get speed and time
        System.out.print("Enter the speed: "); (3)
        speed = in.nextDouble();
        System.out.print("Enter the time: ");
        time = in.nextDouble();

        // Solution to subproblem 2: Compute distance
        distance = speed*time; (4)

        // Solution to subproblem 3: Display output
        System.out.print("Distance traveled: "); (5)
        System.out.print( distance );
        System.out.println(" miles.");
    }
}| 1 | The program starts with import statements, the class definition, and the
definition of the main() method. |
| 2 | At the beginning of the main()
method, we have code to declare and initialize a variable of type
Scanner named in. We also declare variables of type double to hold
the input speed and time and the resulting distance. |
| 3 | We start solving subproblem 1, prompting the user for the speed and the time and using our Scanner object to read them in. Because they are both floating-point values with type double, we use the nextDouble() method for input. |
| 4 | We compute the distance traveled by multiplying speed by time and storing the result in
distance. |
| 5 | The last three lines of the main() method solve subproblem 3 by outputting "Distance traveled: ", the computed distance, and " miles.". If you run the program, all three items are printed on the same line on the terminal. |
2.3.3. GUI input and output
If you’re used to GUI-based programs, you might wonder how to do input and output with a GUI instead of on the command line. GUIs can become complex, but in this chapter we introduce a simple way to do GUI input and output and expand on it further in Chapter 7. Then, we go into GUIs in much more depth in Chapter 15.
A limited tool for displaying output and reading input with a GUI is the
JOptionPane class. This class has a complicated method called
showMessageDialog() that opens a small dialog box to display a
message to the user. If we want to create the equivalent of the
command-line program that displays the number 42, the code would be as
follows.
import javax.swing.JOptionPane; (1)

public class Example {
    public static void main(String[] args) {
        JOptionPane.showMessageDialog(null, "42", "Output Example", (2)
            JOptionPane.INFORMATION_MESSAGE);
	}
}| 1 | Like Scanner, we need to import JOptionPane as shown above in order
to use it. |
| 2 | The showMessageDialog() method takes several arguments to
tell it what to do. For our purposes, the first one is always the
special Java literal null, which represents an empty value. The next
is the message you want to display, but it has to be text. That’s why
"42" appears with quotation marks. The third argument is the title
that appears at the top of the dialog. The final argument gives
information about how the dialog should be presented.
JOptionPane.INFORMATION_MESSAGE is a flag values that specifies that
the dialog is giving information (instead of a warning or a question),
causing an appropriate, system-specific icon to be displayed on the
dialog. |
Figure 2.3 shows what the resulting GUI might look like.
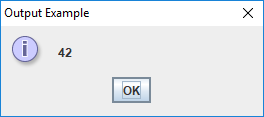
showMessageDialog() used for output.One way to do input with a GUI uses the showInputDialog() method,
which is also inside the JOptionPane class. The showInputDialog()
method returns a value. This means it gives back an answer which
you can store into a variable by putting the method call on the right
hand side of an assignment statement. Otherwise, it’s nearly the same
as showMessageDialog(). The following program prompts the user for his
or her favorite word with a showInputDialog() method and then displays
it again using a showMessageDialog() method.
import javax.swing.JOptionPane;

public class Example {
    public static void main(String[] args) {
        String message = "What is your favorite word?";
        String title = "Input Example";
        String word =
        JOptionPane.showInputDialog(null, message, title, JOptionPane.QUESTION_MESSAGE);
        JOptionPane.showMessageDialog(null, word, title, JOptionPane.INFORMATION_MESSAGE);
    }
}
Note that whatever the user typed in will be stored in word. Finally,
the last line of the program displays this information with
showMessageDialog(). Figure 2.4 shows the
GUI as the user is entering input.
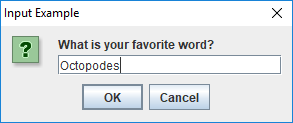
showInputDialog() used for input.Remember that the value returned from the showInputDialog() method is
always text; that is, it always has type String. Although there are
lots of great things you can do with a String value, you can’t do
normal arithmetic like you can with an integer or a floating-point
number. However, there are ways to convert a String representation of
a number to the number itself. If you have a String that represents an
integer, you use the Integer.parseInt() method to convert it. If you
have a String that represents a floating-point number, you use the
Double.parseDouble() method to convert it. The following segment of
code illustrates these issues.
// Text cannot be multiplied by an integer
int x = "41" * 3;

// Correctly converts the text "23" to the integer 23
int y = Integer.parseInt("23");

// Correctly converts the text "3.14159" to 3.14159
double z = Double.parseDouble("3.14159");

// Causes the program to crash
int a = Integer.parseInt("Twenty three");

// Causes the program to crash
double b = Double.parseDouble("pi");
You might wonder why the computer isn’t smart enough to know that "23"
means 23. Remember, the computer has no intelligence. If something is
marked as text, it doesn’t know that it can interpret it as a number.
What kind of data something is depends on its type, which doesn’t
change. We’ll discuss types more deeply in Chapter 3.
The next example uses these two type conversion methods with methods
from JOptionPane in a GUI-based solution to subproblem 1 of the
bouncing ball problem.
We can change the solution given in Program 2.1 to
use the GUI-based input tools in JOptionPane.
Program 2.3 is the equivalent GUI-based Java program.
import javax.swing.*;

public class GetInputGUI {
    public static void main(String[] args) {
        String title = "Bouncing Ball: Subproblem 1";

        // Declare variables to hold input data
        double height, coefficient;
        int bounces;

        // Prompt the user, get data, and convert it
        String response = JOptionPane.showInputDialog(null, (1)
            "Enter the height: ", title, JOptionPane.QUESTION_MESSAGE);
        height = Double.parseDouble(response); (2)
        response = JOptionPane.showInputDialog(null, (3)
            "Enter restitution coefficient: ", title, JOptionPane.QUESTION_MESSAGE);
        coefficient = Double.parseDouble(response);
        response = JOptionPane.showInputDialog(null,
            "Enter the number of bounces: ", title,
			JOptionPane.QUESTION_MESSAGE);
        bounces = Integer.parseInt(response);
    }
}| 1 | At this point the code uses the showInputDialog() method to read a String version of the height from the user. |
| 2 | On the next line, we have to
convert this String version into the double version that we store in
the height variable. |
| 3 | The next four lines read in the coefficient of restitution and the number of bounces and convert them to their appropriate numerical types. |
2.3.4. A few operations
Basic math
To make our code useful, we can perform operations on values and
variables. For example, we used the expression 35 + 7 as an argument
to the System.out.print() method to print 42 to the screen. We can
use the add (+), subtract (-), multiply (*), and divide(/)
operators on numbers to solve arithmetic problems. These operators work
the way you’d expect them to (except that division has a few surprises).
We’ll go into these operators and others more deeply in
Chapter 3. Here are examples of
these four operators used with integer and floating-point numbers.
int a = 2 + 3;         // a will hold 5
int b = 2 - 3;         // b will hold -1
int c = 2 * 3;         // c will hold 6
int d = 2 / 3;         // d will hold 0 (explained later)

double x = 1.6 + 3.2;  // x will hold 4.8
double y = 1.6 - 3.2;  // y will hold -1.6
double z = 1.6 * 3.2;  // z will hold 5.12
double w = 1.6 / 3.2;  // w will hold 0.5
Other operations
These basic operations can mix values and variables together. As we’ll
discuss later, they can be arbitrarily complicated with order of
operations determining the final answer. Nevertheless, we also need ways
to accomplish other mathematical operations such as raising a number to
a power or finding its square root. The Math class has methods that
perform these and other functions. To raise a number to a power, we call
Math.pow() with two arguments: first the base and then the exponent.
To find a square root, we pass a number to the Math.sqrt() method.
// Raises 3.0 to the power 2.5, approximately 15.588457
double p = Math.pow(3.0, 2.5);

// Finds the square root of 2.0, approximately 1.4142136
double q = Math.sqrt(2.0);We compute the final height of the ball in subproblem 2 of the bouncing
ball problem. To do so, we have to multiply the height by the
coefficient of restitution raised to the power of the number of bounces.
The following program does so, using the Math.pow() method.
public class ComputeHeight {
    public static void main(String[] args) {
        // Use dummy values to test subproblem 2
        double height = 15, coefficient = 0.3;
        int bounces = 10;
        // Compute height after bounces
        double bounceHeight = height*Math.pow(coefficient,bounces);
        System.out.println(bounceHeight); // For testing
    }
}
Program 2.4 is only focusing on subproblem 2, but,
if we want to test it, we need to supply some dummy values for height,
coefficient, and bounces, since these are read in by the solution to
subproblem 1. Likewise, the output statement on the last line of the
main() method is just for testing purposes. The complete solution has
more complex output.
String concatenation
Just as we can add numbers together, we can also “add” pieces of text
together. In Java, text has the type String. If you use the +
operator between two values or variables of type String, the result is
a new String that is the concatenation of the two previous String
values, meaning that the result is the two pieces of text pasted
together, one after the other. Concatenation doesn’t change the String
values you’re concatenating.
The results may be illegal or at least unexpected if you mix types (String, int,
double) together when doing mathematical operations. However, feel
free to concatenate String values with any other type using the +
operator. When you do so, the other type is automatically converted into
a String. This behavior is useful since any String is easy to
output. Here are a few examples of String concatenation.
String word1 = "tomato";
String word2 = "sauce";
String text1 = word1 + word2; 			// text1 contains "tomatosauce"
String text2 = word1 + " " + word2; 	// text2 contains "tomato sauce"
String text3 = "potato " + word1;		// text3 contains "potato tomato"
String text4 = 5 + " " + word1 + "es"; // text4 contains "5 tomatoes"With String concatenation, subproblem 3 becomes a bit easier. We
concatenate the results together with an appropriate message and then
use the System.out.println() method for output.
public class DisplayHeightCLI {
    public static void main(String[] args) {
        // Use dummy values to test subproblem 3
        int bounces = 10;
        double bounceHeight = 2.0;
        String message = "After " + bounces +
            " bounces the height of the ball is: " + bounceHeight + " feet";
        System.out.println(message);
    }
}
Program 2.5 is only focusing on subproblem 3,
but if we want to test it, we need to supply dummy values for bounces
and bounceHeight, since these are generated by the solution to earlier
subproblems.
The same concatenation can be used for GUI output as well. The only
difference is the use of
JOptionPane.showMessageDialog() instead of System.out.println().
import javax.swing.*;

public class DisplayHeightGUI {
    public static void main(String[] args) {
        String title = "Bouncing Ball: Subproblem 3";
        // Use dummy values to test subproblem 3
        int bounces = 10;
        double bounceHeight = 2.0;
        String message = "After " + bounces +
            " bounces the height of the ball is: " + bounceHeight + " feet";
        JOptionPane.showMessageDialog(null, message, title,
            JOptionPane.INFORMATION_MESSAGE);
    }
}
2.3.5. Java formatting
Writing good Java code has some similarities to writing effectively in English. There are rules you have to follow in order to make sense, but there are also guidelines you should follow to make your code easier to read for yourself and everyone else.
Variable and class naming
Java programs are filled with variables, and each variable should be named to reflect its contents. Variable names are essentially unlimited in length (although the JVM you use may limit this length to thousands of characters). A tremendously long variable name can be hard to read, but abbreviations can be worse. You want the meaning of your code to be obvious to others and to yourself when you come back days or weeks later.
Imagine you’re writing a program that sells fruit. Consider the following names for a variable that keeps track of the number of apples.
| Name | Attributes |
|---|---|
|
Too short, gives no useful information |
|
Too short, vague, could mean applications or appetizers |
|
Too short, vague, could mean center |
|
Not bad, but counting what? |
|
Too long for no good reason |
|
Very clear |
|
Concise and clear, unless there are multiple apple quantities
such as |
Mathematics is filled with one letter variables, partly because there’s
a history of writing mathematics on chalkboards and paper. Clarity is
more important than brevity with variables in computer programs. Some
variables need more than one word to be descriptive. In that case,
programmers of Java are encouraged to follow camel case. In camel
case, multi-word variables and methods start with a lowercase letter and
then use an uppercase letter to mark the beginning of each new word. It’s
called camel case because the uppercase letters are reminiscent of
the humps of a camel. Examples include lastValue, symbolTable, and
makeHamSandwich().
By convention, class names should always begin with a capital letter,
but they also use camel case, marking the beginning of
each new word with an uppercase letter. Examples include LinkedList, JazzPiano, and
GlobalNuclearWarfare.
Another convention is that constants, variables whose values never
change, have names in all uppercase, separated by underscores. Examples
include PI, TRIANGLE_SIDES, and
UNIVERSAL_GRAVITATIONAL_CONSTANT.
Spaces are not allowed in variable, method, or class names. Recall that
a name in Java is called an identifier. The rules for identifiers
specify that they must start with an uppercase or lowercase letter (or
an underscore) and that the remaining characters must be letters,
underscores, or numerical digits. Thus, Tupac and
the absurd _5 are legal identifiers, but Motley Crue and
2Pac are not.
In Java, letters can mean more than just the Latin letters A through Z.
Java has support for many of the world’s languages,
allowing identifiers to contain characters from Chinese, Thai,
Devanagari, Cyrillic, and other scripts. For example, m\u00F6tleyCr\u00FCe
is a legal variable name because \u00F6 is way of encoding ö and
\u00FC is a way of encoding ü. In some systems, this variable name might
be rendered mötleyCrüe, but the compiler could complain if you type those characters in directly. In short, Java supports a huge range of
characters, but making that support work for you is sometimes more challenging.
Section 3.3.2.10 discusses character encoding further.
Remember that keywords also cannot be used as identifiers. For example,
public, static, and class are all keywords in Java and can never
be the names of classes, variables, or methods.
White space
Although you are not allowed to have spaces in a Java identifier, you can usually use white space (spaces, tabs, and new lines) wherever you want. Java ignores extra space. Consider the following line of code.
int x = y + 5;It’s equivalent to the next one.
int x=y+5;We chose to type our earlier example of a program performing output as follows.
public class Example {
    public static void main(String[] args) {
        System.out.print(42);
    }
}
However, we could have been more chaotic with our use of whitespace.
        public
class          Example {
public
    static void
    main (String     [
        ] args
        ) {
            System.
    out
        .print(42

) ; } }
Or we could have used almost no whitespace at all.
public class Example{public static void main(String[]args){System.out.print(42);}}These three programs are identical in the eyes of the Java compiler, but the first one is easier for a human to read. You should use whitespace to increase readability. Don’t add too much whitespace with lots of blank lines between sections of code. On the other hand, don’t use too little and cramp the code together. Whenever code is nested inside of a set of braces, indent the contents so that it’s easy to see the hierarchical relationship.
The style we present in this book puts the left brace ({) on the line
starting a block of code. Another popular style puts the left brace on
the next line. Here is the same example program formatted in this style:
public class Example
{
    public static void main(String[] args)
    {
        System.out.print(42);
    }
}
There are people (including some authors of this book) who prefer this style because it’s easier to see where blocks of code begin and end. However, the other style uses less space, so we use it throughout the book. You can make your own choices about style, but be consistent! If you work for a software development company, they may have strict standards for code formatting.
Comments
As we mentioned before, you can leave comments in your code whenever you
want someone reading the code to have extra information. Java has three
different kinds of comments. We described single-line comments, which
start with a // and continue until the end of the line.
If you have a large block of text you want as a comment, you can create
a block comment, which starts with a /* and continues until it reaches
a */.
Beyond leaving messages for other programmers, you can also “comment out” existing code. By putting Java code inside a comment, it no longer affects program execution. This practice is common when programmers want to remove or change some code but are reluctant to delete it until the new version of the code has been tested. Don’t overuse the practice of commenting out code! Large programs become hard to navigate when they’re cluttered with many chunks of commented-out code.
The third kind of comment is called a documentation comment and
superficially looks a lot like a block comment. A documentation comment
starts with a /** and ends with a */. These comments are supposed to
come at the beginning of classes and methods and explain what they’re
used for and how to use them. A tool called javadoc is used to run
through documentation comments and generate an HTML file that users can
read to understand how to use the code. This tool is a feature
that has contributed greatly to the popularity of Java, keeping its
libraries well-documented and easy to use. However, we do not
discuss documentation comments deeply in this book.
Here is our example output program, heavily commented.
/**
 *  Class Example prints the number 42 to the screen.
 *  It contains an executable main() method.
 */
public class Example {
    /*
     * The main() method was last updated by Barry Wittman.
     */
    public static void main(String[] args) {
        System.out.print(42);  // answer to everything
    }
}
Comments are a wonderful tool, but clean code with meaningful variable names and careful use of whitespace doesn’t require too much commenting. Never hesitate to comment, but always ask yourself if there is a way to write the code so clearly that a comment is unnecessary.
2.4. Solution: How to solve problems
The problem solving steps given in Section 2.2 are sound, but they depend on being able to implement your planned solution in Java. In this chapter we have introduced far too little Java to expect to solve all the problems that can be solved with a computer. However, we can show the solution to the bouncing ball problem and explain how our solution works through the software development lifecycle.
2.4.1. Bouncing ball solution (command line version)
In Example 2.2, we made sure we understood the problem and then formed a three-part plan to read in the input, compute the height of the bounce, and then output it.
In Program 2.1, we implemented subproblem 1, reading the input from the command line. In Program 2.4, we implemented subproblem 2, computing the height of the final bounce. In Program 2.5, we implemented subproblem 3, displaying the height that was computed. In the final, integrated program, the portion of the code that corresponds to solving subproblem 1 is below.
import java.util.*;

public class BouncingBallCLI {
    public static void main(String[] args) {
        // Solution to subproblem 1
        // Create an object named in for input
        Scanner in = new Scanner(System.in);

        // Declare variables to hold input data
        double height, coefficient;
        int bounces;

        System.out.println("Bouncing Ball");

        // Prompt the user and read data from the keyboard
        System.out.println("Bouncing Ball: Subproblem 1");
        System.out.print("Enter the height: ");
        height = in.nextDouble();
        System.out.print("Enter restitution coefficient: ");
        coefficient = in.nextDouble();
        System.out.print("Enter the number of bounces: ");
        bounces = in.nextInt();
With the imports, class declaration, and main() method set up by the
solution to subproblem 1, the solution to subproblem 2 is very short.
        // Solution to subproblem 2
        double bounceHeight = height*Math.pow(coefficient,bounces);
The solution to subproblem 3 and the braces that mark the end of the
main() method and then the end of the class only take up a few
more lines.
        // Solution to subproblem 3
        String message = "After " + bounces +
            " bounces the height of the ball is: " + bounceHeight + " feet";
        System.out.println(message);
    }
}
2.4.2. Bouncing ball solution (GUI version)
If you prefer a GUI for your input and output, we can integrate the GUI-based versions of the solutions to subproblems 1, 2, and 3 from Program 2.1, Program 2.4, and Program 2.6. The final program is below. It only differs from the command line version in a few details.
import javax.swing.*;

public class BouncingBallGUI {
    public static void main(String [] args) {
        // Solution to sub-problem 1
        String title = "Bouncing Ball";
        double height, coefficient;
        int bounces;

        // Prompt the user, get data, and convert it
        String response = JOptionPane.showInputDialog(null,
            "Enter the height: ", title, JOptionPane.QUESTION_MESSAGE);
        height = Double.parseDouble(response);
        response = JOptionPane.showInputDialog(null,
            "Enter restitution coefficient: ", title, JOptionPane.QUESTION_MESSAGE);
        coefficient = Double.parseDouble(response);
        response = JOptionPane.showInputDialog(null,
            "Enter the number of bounces: ", title, JOptionPane.QUESTION_MESSAGE);
        bounces = Integer.parseInt(response);

        // Solution to sub-problem 2
        double bounceHeight = height*Math.pow(coefficient,bounces);

        // Solution to sub-problem 3
        String message = "After " + bounces +
            " bounces the height of the ball is: " + bounceHeight + " feet";
        JOptionPane.showMessageDialog(null,
            message, title, JOptionPane.INFORMATION_MESSAGE);
    }
}
2.4.3. Testing and maintenance
Testing and maintenance are key elements of the software engineering lifecycle and often take more time and resources than the rest. However, we only discuss them briefly here.
The ball bouncing problem is not complex. There are a few obvious things to test. We should pick a “normal” test case such as a height of 15 units, a coefficient of restitution of 0.3, and 10 bounces. The height should be 15 · 0.310 = 0.0000885735. The result computed by our program should be the same, ignoring floating-point error. We can also check some boundary test cases. If the coefficient of restitution is 1, the ball should bounce back perfectly, reaching whatever height we input. If the coefficient of restitution is 0, the ball doesn’t bounce at all, and the final height should be 0.
Our code does not account for users entering badly formatted data like
two instead of 2. Likewise, our code does not detect invalid values
such as a coefficient of restitution greater than 1 or a negative number
of bounces. An industrial-grade program should. We’ll discuss testing
further in Chapter 16.
As with most of the problems we discuss in this book, issues of maintenance will not apply: we don’t have a customer base to keep happy. Even so, it’s a good thought exercise to imagine a large-scale version of this program that can solve many different kinds of physics problems. Who are likely to be your clients? What kinds of bugs are likely to creep into such a program? How would you provide bug-fixes and develop new features?
2.5. Concurrency: Solving problems in parallel
2.5.1. Parallelism and concurrency
The terms parallelism and concurrency are often confused and sometimes used interchangeably. Parallelism or parallel computing occurs when multiple computations are being performed at the same time. Concurrency occurs when multiple computations may interact with each other. The distinction is subtle since many parallel computations are concurrent and vice versa.
An example of parallelism without concurrency is two separate programs running on a multicore system. They are both performing computations at the same time, but for the most part, they aren’t interacting with each other. Concurrency issues might arise if these programs try to access a shared resource, such as a file, at the same time.
An example of concurrency without parallelism is a program with multiple threads of execution running on a single-core system. These threads will not execute at the same time as each other. However, the OS or run-time system will interleave the execution of these threads, switching back and forth between them whenever it wants to. Since these threads can share memory, they can still interact with each other in complicated and often unpredictable ways.
With multicore computers, we want good and effective parallelism, computing many things at the same time. Unfortunately, striving to reach parallelism often means struggling with concurrency and carefully managing the interactions between threads.
2.5.2. Sequential versus concurrent programming
Imagine that the evil Lellarap aliens are attacking Earth. They have sent an extensive list of demands to the world’s leaders, but only a few people, including you, have mastered their language, Lellarapian. To save the people of Earth, it’s imperative that you translate their demands as quickly as possible so world leaders can choose a course of action. If you do it alone, as illustrated in Figure 2.5(a), the Lellaraps might attack before you finish.
In order to finish the work faster, you hire a second translator whose skills in Lellarap are as good as yours. As shown in Figure 2.5(b), you divide the document into two nearly equal parts, Document A and Document B. You translate Document A, and your colleague translates Document B. When both translations are complete, you merge the two, check the translation, and send the result to the world’s leaders.

Translating the demands alone is a sequential approach. In this context, sequential mean non-parallel. Translating the demands with two people is a parallel approach. It’s concurrent as well because you have to decide how to split up the document and how to merge it back together.
If you wrote a computer program to translate the demands using the sequential approach, you’d produce a sequential program. If you wrote a computer program that uses the approach shown in Figure 2.5(b), it would be a concurrent program. A concurrent program is also referred to as a multi-threaded program. Threads are sequences of code that can execute independently and access each other’s memory. Imagine you’re one thread of execution and your colleague is another. Thus, the concurrent approach will have at least two threads. It may have more if separate threads are used to divide up the document or merge it back together.
Because we’re interested in the time the process takes, we’ve labeled different tasks in Figure 2.5 with their running times. We let ts be the time for one person to complete the translation. The times t1 through t4 mark the times needed to complete tasks 1 through 4, indicated in Figure 2.5(b).
2.5.3. Kinds of concurrency
A sequential program, like the single translator, uses a single processor on a multi-processor system or a single core on a multicore chip. To speed up the solution of a program on a multicore chip, it may be necessary to divide a problem so that different parts of it can be executed concurrently.
This process of dividing up a problem falls into the category of domain decomposition, task decomposition, or some combination of the two. In domain decomposition, we take a large amount of data or elements to be processed and divide up the data among workers that all do the same thing to different parts of the data. In task decomposition, each worker is assigned a different task that needs to be done. The following two examples explore each of these approaches.
Suppose we have an autonomous robot called the Room Rating Robot or R3. The R3 can measure the area of any home. Suppose that we want to use an R3 to measure the area of the home with two floors sketched in Figure 2.6.

One way to measure the area is to put an R3 at the entrance of the home on the first floor and give it the following instructions:
-
Initialize total area to 0
-
Find area of next room and add to total area
-
Repeat Step 2 until all rooms have been measured
-
Move to second floor
-
Repeat Step 2 until all rooms have been measured
-
Display total area
By following these steps, the R3 will systematically go through each room, measure its area, and add the value to the total area found so far. It’ll then climb up the stairs and repeat the process for the second floor. It would add up the areas from the two floors and give us the total living area of the house. This is a sequential approach for measuring the area.
Now, suppose we have two R3 robots, named R3A and R3B. We can put R3A on the first floor and R3B on the second. Both robots are then instructed to find the area of the floor they’re on using steps very similar to the ones listed above for a sequential solution. When done, we add together the answers from R3A and R3B to get the total. This is a concurrent (and also parallel) approach for measuring the living area of a home with two floors. Using two robots this way could speed up the time it takes to measure the area.
In the example above, the tasks are the same (measuring the area) but are performed on two different input domains (the floors). This type of task division is also known as domain decomposition. Here, to achieve concurrency, we take the domain of the problem (the house) and divide it into smaller subdomains (its floors). Then, each processor (or robot in this example) performs the same task on each subdomain. When done, the final answer is found by combining the answers. Running the robots on each floor is purely parallel, but combining the answers is concurrent since some interaction between the robots is necessary.
Another way of solving a problem concurrently is to divide it into fundamentally different tasks. The tasks could be executed on different processors and perhaps on different input domains. Eventually, some coordination of the tasks must be done to generate the final result. The next example illustrates such a division.
Let’s expand the problem given in Example 2.8. R3 robots can do more than just measure area. In addition to calculating the living area of a home, we want an R3 robot to check if the electrical outlets are in working condition. The robot should give us the area of the house as well as a list of electrical outlets that are not working.
This problem can be solved in a sequential manner with just one robot. One way to do so would have a robot make a first pass through all floors and rooms and compute the living area. It could then make a second pass and compile a list of electrical outlets that are not working.
A way to solve this problem concurrently is to assign R3A to measure the area and R3B to identify broken electrical outlets. Once the respective tasks are assigned, we place the robots at the entrance to the house and activate them. It’s possible that the two robots will bump into each other while working, and that’s one of the difficulties of concurrency. The burden is on the programmer to give instructions so that the robots can avoid or recover from collisions. After the robots are done, we ask R3A for the living area of the house and R3B for a list of broken outlets.
2.6. Summary
In this chapter, we introduced an approach for developing software to solve problems with a computer. A number of examples illustrated how to move from a problem statement to a complete Java program. Although we have given rough explanations of the Java programs in this chapter, we encourage you to play with each program to expand its functionality. Several exercises prompt you to do just that. It’s impossible to learn to program without actively practicing programming. Never be afraid of “breaking” the program. Only by breaking it, changing it, and fixing it will your understanding grow.
In addition to the software development lifecycle, we introduced several
building blocks of Java syntax including classes, main() methods,
import statements, and variable declarations. We also gave a preview of
different variable types (int, double, and String) and operations
that can be used with them. Material about types and operations on them
is covered in depth in the next chapter. Furthermore, we discussed input
and output using Scanner and System.out.print() for the command line
interface and JOptionPane methods for a GUI.
Finally, we introduced the notions of sequential and concurrent solutions to problems and clarified the subtle difference between parallelism and concurrency.
2.7. Exercises
Conceptual Problems
-
When solving a problem using a computer, what problem is solved by the programmer and what problem is solved by the program written by the programmer? Are they the same?
-
In Program 2.2, we declared all variables to be of type
double. How would the program behave differently if we had declared all the variables with typeint? -
What is the purpose of the statement
Scanner in = new Scanner(System.in);in Program 2.1? -
Explain the difference between a declaration and an assignment statement.
-
Is the following statement from Program 2.7 a declaration, an assignment, or a combination of the two?
String response = JOptionPane.showInputDialog(null, message, title, JOptionPane.QUESTION_MESSAGE); -
When would you prefer using the
JOptionPaneclass for output overSystem.out.print()? When might you preferSystem.out.print()to usingJOptionPane? -
Review Program 2.7 and identify all the Java keywords used in it.
-
Try to recompile Program 2.7 after removing the
importstatement at the top. Read and explain the error message generated by the compiler. -
Explain the difference between parallel and concurrent tasks. Give examples of tasks that are parallel but not concurrent, tasks that are concurrent but not parallel, and tasks that are both.
-
Refer to Figure 2.5. Suppose that you and your colleague translate from English to Lellarapian at the rate of 200 words per hour. Suppose that the list of demands contains 10,000 words.
-
Compute ts, the time for you to translate the entire document alone, assuming that, after translation, you perform a final check at the rate of 500 words per hour.
-
Now assume that the task of splitting up the document and handing over the correct part to your colleague takes 15 minutes. Also, the task of receiving the translated document from your colleague and merging with the one you translated takes another 15 minutes. After merging the two documents, you do a final check for correctness at a rate of 500 words per hour. Calculate the total time to complete the translation using this concurrent approach. Let us refer to this time as tc.
-
One way to calculate the speedup of a concurrent solution is to divide the sequential time by the concurrent time. In our case, the speedup is ts/tc. Using the values you’ve computed in (a) and (b), calculate the speedup.
-
Suppose that you have a total of two colleagues willing to help you with the translation. Assuming that the three of you will perform the translation and that the times needed to split, merge, and check are unchanged, calculate the total time needed. Then, compute the speedup.
-
Now suppose that there are an unlimited number of people willing and able to help you with the translation. Will the speedup keep on increasing as you add more translators? Explain your answer.
-
-
In Example 2.8, what aspect of a multicore system do the robots represent?
-
In Example 2.8, suppose that you have two R3 robots available. You’d like to use them to measure the living area of a single-floor home. Suggest how two robots could be programmed to work concurrently to measure the living area faster than one.
Programming Practice
-
Write a program that prompts the user for three integers from the command line. Read each integer in using the
nextInt()method of aScannerobject. Compute the sum of these values and print it to the screen usingSystem.out.print()orSystem.out.println(). -
Expand the program from Exercise 2.13 so that it finds the average of the three numbers instead of the sum. (Hint: Try dividing by
3.0instead of3to get an average with a fractional part. Then, store the result in a variable of typedouble.) -
Rewrite your solution to Exercise 2.14 so that it uses a
JOptionPane-based GUI instead ofScannerandSystem.out.print(). -
Copy and paste Program 2.1 into the Java IDE you prefer. Compile and run it and make sure that the program executes as intended. Then, add statements to prompt the user for the color of the ball and read it in. Store the color in a
Stringvalue. Add an output statement that mentions the color of the ball. -
Rewrite your solution to Exercise 2.16 so that it uses a
JOptionPane-based GUI instead ofScannerandSystem.out.print(). -
In Example 2.4, we assumed that the speed is given in miles per hour and the time in hours. Change Program 2.2 to compute the distance traveled by a moving object given its speed in miles per hour but time in seconds. You will need to perform a conversion from seconds to hours before you can find the distance.
-
A program can use both a command line interface and a GUI to interact with a user. Write a program that uses the
Scannerclass to read aStringvalue containing the user’s favorite food. Then display the name of the food usingJOptionPane. -
Use the complete software development cycle to write a program that reads in the lengths of two legs of a right triangle and computes the length of its hypotenuse.
-
Make sure you understand the problem. How can you apply the Pythagorean formula a2 + b2 = c2 to solve it?
-
Design a solution by listing the steps you will need to take to read in the appropriate values, find the answer, and then output it.
-
Implement the steps as a Java program.
-
Test the solution with several known values. For example, a right triangle with legs of lengths 3 and 4 has a hypotenuse of length 5. Which values cause errors? How should your program react to those errors?
-
Consider what other features your program should have. If your intended audience is children who are learning geometry, should your error handling be different from an audience of architects?
-